How to Apply Eyeliner for Beginners: A Step-by-Step Tutorial
KNK Awadh Salon & Academy
Senior Editorial & Salon Master Stylists, Awadh
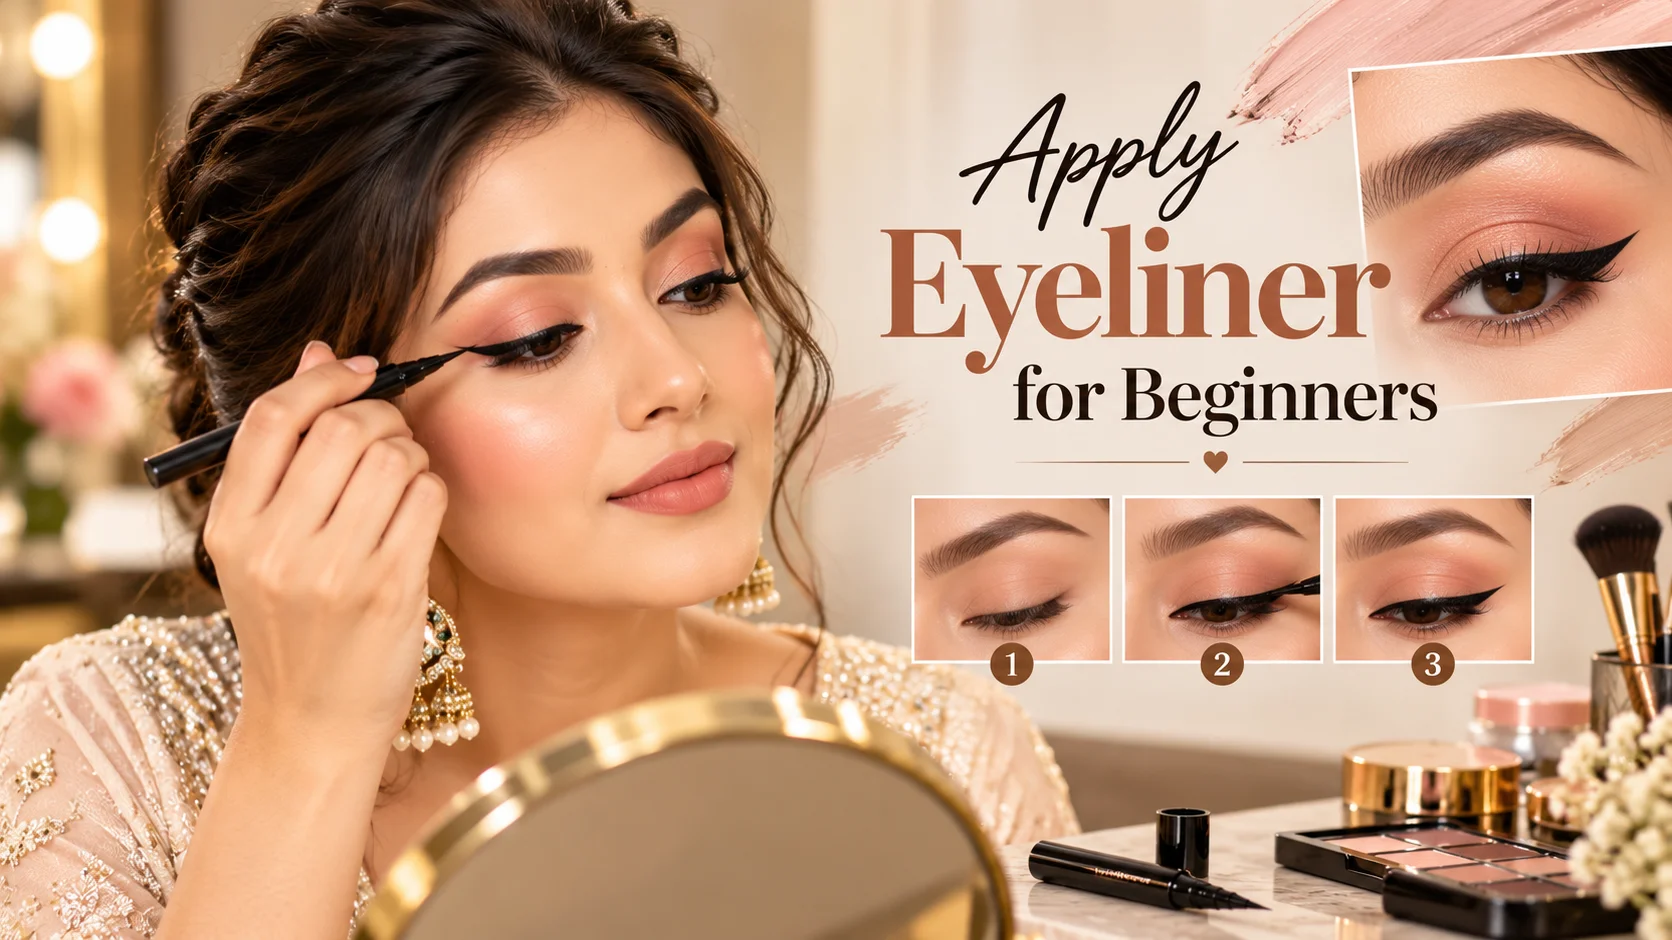
Learning how to apply eyeliner can make everyday eye makeup look more defined, polished and expressive. However, if you are new to makeup, creating an even line, matching both eyes or drawing a smooth wing can take practice.
The good news is that you do not need to master complicated techniques to get started. With the right eyeliner, a comfortable application method and a few simple steps, you can create anything from a natural everyday look to a classic winged eyeliner style.
In this guide, KNK Awadh Salon & Academy explains how to apply eyeliner for beginners, how to choose between pencil and liquid eyeliner, how to adapt your technique to different eye shapes, and how to prevent common problems such as smudging and uneven lines.
How Do You Apply Eyeliner for Beginners?
To apply eyeliner as a beginner, start with clean, dry eyelids and choose a pencil or fine-tip eyeliner that is easy to control. Look straight into a mirror, gently steady your hand and draw small strokes along the upper lash line. Connect the strokes gradually instead of drawing one long line. Once you are comfortable with a simple line, practise a small wing at the outer corner of each eye.
Beginner tip: Start with a thin line close to the lashes. You can always build up the thickness after checking the result with your eyes open.
1. Choose the Right Eyeliner for Your Skill Level
Choosing an eyeliner that suits your experience can make application easier. Different formulas offer different levels of control, intensity and finish.
Pencil Eyeliner
Pencil eyeliner is often a comfortable starting point for beginners because it allows you to create a soft line using short strokes. It is suitable for subtle everyday makeup, a softly defined lash line and some smudged eyeliner looks.
Best for: Beginners, natural eye makeup and soft definition.
Application tip: Use a well-maintained pencil and apply light pressure. Build the colour gradually rather than pressing hard against the eyelid.
Liquid Eyeliner
Liquid eyeliner is useful when you want a crisp, defined line or a sharp wing. Depending on the applicator, it may take more practice to control than a pencil.
Best for: Defined eyeliner, classic wings and more graphic styles.
Application tip: Rest your elbow on a stable surface and use small strokes. Allow the formula to dry before blinking normally.
Gel Eyeliner
Gel eyeliner is usually applied with a suitable brush or applicator. It can create defined lines or softer, blended looks depending on the product and technique.
Best for: People who want more control over line thickness and shape with a brush.
Application tip: Use a small amount of product and keep the brush clean.
Eyeliner Pen
A fine-tip eyeliner pen combines a pen-style grip with a defined applicator. Some beginners find this format easier to handle, although the best choice depends on personal preference.
Best for: Fine lines, controlled strokes and practising a small wing.
Application tip: Check the tip before applying and store the product according to the manufacturer's instructions.
2. Prepare Your Eyelids Before Applying Eyeliner
Good preparation helps eyeliner apply more evenly and can reduce unwanted transfer.
Follow these steps:
-
Start with clean eyelids and remove any leftover eye makeup.
-
Make sure the eyelid area is dry before application.
-
If you use eye primer or concealer, apply a suitable thin layer and allow it to set.
-
Avoid applying excessive moisturiser or oily products directly over the area where you want the eyeliner to stay.
-
Keep a clean cotton bud and a suitable eye-makeup remover nearby for small corrections.
If your eyelids are oily, choose products designed for longer wear and follow the product instructions. No formula can guarantee that eyeliner will never smudge.
3. How to Apply Eyeliner Step by Step
Follow this beginner-friendly method to create a neat upper lash line.
Step 1: Find a Comfortable Position
Sit in front of a well-lit mirror. Keep your elbow supported on a stable surface to help reduce hand movement.
Avoid pulling the skin tightly around the eye. A relaxed position makes it easier to see the natural shape of your eyelid.
Step 2: Look Straight Ahead
Look into the mirror with your eyes naturally open, then glance slightly downward when needed to access the lash line.
Checking your eyes in their natural position is especially helpful if you have hooded eyelids, because a line that looks perfect with closed eyes may appear different when you open them.
Step 3: Start at the Middle of the Upper Lash Line
Place the eyeliner close to the roots of your upper eyelashes. Begin with small strokes from the centre of the eyelid towards the outer corner.
Keep the line thin at first. A subtle line is easier to correct than one that is too thick.
Step 4: Work Towards the Inner Corner
Use shorter, lighter strokes as you move towards the inner corner of your eye. Avoid pressing too hard or stretching the eyelid to create a perfectly straight surface.
For a natural look, leave the inner corner delicate rather than creating a thick block of colour.
Step 5: Connect the Strokes
Gently join the small strokes to create a continuous line. If you notice tiny gaps, fill them carefully without repeatedly layering product over the entire eyelid.
The goal is to define the lash line rather than cover the eyelid with a thick band of eyeliner.
Step 6: Check the Result With Your Eyes Open
Look straight ahead and compare the thickness and shape on both sides.
Small differences are normal because eyes are naturally different. Make corrections gradually instead of repeatedly removing and redrawing the entire line.
Step 7: Add Mascara if Desired
Once the eyeliner has dried, apply mascara if it is part of your makeup routine. Follow the instructions for each product and avoid getting cosmetics directly into your eyes.
For a simple everyday look, a thin eyeliner line and mascara may be all you need.
4. How to Apply Winged Eyeliner for Beginners
Winged eyeliner extends beyond the outer corner of the eye to create a lifted, elongated or more dramatic effect. The best angle and thickness depend on your eye shape and the look you want.
Easy Winged Eyeliner Method
-
Look straight ahead into a mirror.
-
Imagine a line extending from the outer corner of your eye towards the outer end of your eyebrow. Use this only as a visual guide, not a strict rule.
-
Draw a short, fine flick from the outer corner.
-
Connect the tip of the flick back to the upper lash line to form a small triangle.
-
Fill the triangle with eyeliner.
-
Refine the edge with small strokes and compare both eyes while looking straight ahead.
How do you make both eyeliner wings match?
Create the first wing lightly, then use its angle and approximate length as a guide for the second eye. Compare both wings with your eyes open before making either one thicker. Aim for a balanced overall appearance rather than perfect symmetry.
Tips for a Cleaner Wing
-
Begin with a short flick rather than a long line.
-
Use a fine-tip applicator if you want a sharp edge.
-
Keep a cotton bud and eye-safe makeup remover available for corrections.
-
Avoid adding thickness too quickly.
-
If one wing looks longer, adjust the shorter side gradually before changing the longer one.
5. How to Apply Eyeliner for Different Eye Shapes
There is no single eyeliner style that suits everyone. Your natural eye shape, eyelid space, personal style and comfort can all influence the technique you prefer.
Eyeliner for Hooded Eyes
With hooded eyes, some eyelid space may be covered by the skin above the crease. A thick line can appear uneven or become less visible when the eyes are open.
Try these techniques:
-
Start with a thin line close to the upper lashes.
-
Check the shape while looking straight ahead.
-
Keep the wing short and adjust its angle to your visible eyelid space.
-
Build thickness gradually only where needed.
-
Consider a fine-tip product that allows controlled application.
The aim is to create a line that looks balanced with your eyes naturally open.
Eyeliner for Small Eyes
If you want your eyes to look more open, a thin upper lash-line definition can be a useful starting point.
Try these techniques:
-
Keep the upper line relatively fine.
-
Avoid surrounding the entire eye with a very thick, dark line if that makes the eyes look visually smaller to you.
-
Experiment with a subtle outer-corner flick.
-
If using eyeliner on the lower lash line, keep it light and blended.
-
Consider a light eyeshadow or other eye makeup techniques if they suit your preferred look.
Avoid assuming that every person with small eyes needs the same technique. Test the result and choose what feels flattering to you.
Eyeliner for Almond Eyes
Almond-shaped eyes often work well with a range of eyeliner styles, from thin everyday lines to classic wings.
Try following the upper lash line and gradually adjusting the thickness towards the outer corner. A small wing can emphasise the eye's natural shape without requiring a heavy line.
Eyeliner for Round Eyes
For a more elongated effect, you can keep the inner part of the lash line thin and add definition towards the outer corner. A short wing may create a more extended appearance.
For a rounded, open-eyed look instead, use a softer line that follows the natural curve of the eye.
Eyeliner for Downturned Eyes
If the outer corners of your eyes naturally angle downward, experiment with a short flick that extends slightly outward before turning upwards. Keep the wing subtle at first and check it with your eyes open.
A very long or thick wing is not essential; small adjustments can make the overall look feel more balanced.
Eyeliner for Everyday Indian Eye Makeup
For a simple Indian-inspired everyday look, try a fine black or brown line along the upper lash line. You can combine it with kajal or eyeshadow according to your preference and the occasion.
For weddings, festivals or evening events, the eyeliner can be more defined. Choose the finish and intensity to complement your overall makeup rather than following a trend automatically.
6. How to Stop Eyeliner From Smudging
Smudging can happen because of oily eyelids, watery eyes, product transfer, humidity, application technique or the formula itself.
These tips may help reduce it:
-
Prepare the eyelids: Start with clean, dry skin.
-
Use suitable products: Choose an eyeliner formula intended for your preferred wear time.
-
Apply thin layers: Excess product can transfer more easily before it sets.
-
Allow it to dry: Follow the product's instructions before blinking normally or applying another product nearby.
-
Avoid rubbing your eyes: Rubbing can disturb eyeliner and other eye makeup.
-
Consider your eye shape: If your upper eyelid touches the area above the lash line, adjust the placement and thickness.
-
Remove makeup gently: Use a suitable eye-makeup remover instead of scrubbing the delicate eye area.
Waterproof products may offer better resistance to water for some users, but they still need to be removed carefully and may not suit every person's eyes.
If a cosmetic causes persistent irritation, redness or discomfort, stop using it. Seek appropriate medical advice for ongoing symptoms.
7. Common Eyeliner Mistakes and How to Fix Them
Mistake 1: Drawing One Long Line
Trying to create a perfect line in one movement can make the result uneven.
Fix: Use short strokes and connect them gradually.
Mistake 2: Applying Too Much Product
A thick line can be difficult to correct and may overpower a subtle makeup look.
Fix: Start thin, check your eyes open and build only where needed.
Mistake 3: Pulling the Eyelid Too Tightly
Stretching the skin can change the shape of the line once the eyelid returns to its natural position.
Fix: Keep your expression relaxed and use a supported hand position.
Mistake 4: Making Both Wings Too Different
Trying to perfect one wing before starting the other may make it harder to compare the overall shape.
Fix: Create both wings lightly, compare them with your eyes open and refine them in small steps.
Mistake 5: Ignoring Eyelid Shape
A line drawn with the eyes closed may not look the same when you open them.
Fix: Check the result in your natural eye position and adjust the line to suit your visible lid space.
Mistake 6: Rubbing Away Every Small Imperfection
Repeatedly wiping the eyelid can irritate the skin and remove surrounding makeup.
Fix: Use a small cotton bud with an appropriate remover for targeted corrections, then let the area dry before reapplying product.
8. Should You Apply Eyeliner Before or After Eyeshadow?
The order depends on the look you want and the products you use.
For many eye makeup looks, applying eyeshadow before liquid eyeliner helps keep the liner crisp and visible. If you prefer a soft, smoky effect, you can apply pencil or gel eyeliner and gently blend it before adding complementary eyeshadow.
For a sharp wing, apply the eyeliner after your main eyeshadow blending is complete. Let it dry before moving on to the next step.
There is no universal order for every technique. Choose the sequence that gives you the finish you want without disturbing the products already applied.
9. How to Choose Between Pencil and Liquid Eyeliner
If you are deciding which eyeliner to learn first, consider your preferred look and how comfortable you feel with each applicator.
| Feature | Pencil eyeliner | Liquid eyeliner |
|---|---|---|
| Beginner control | Often easier for soft, short strokes | May require more practice |
| Typical finish | Soft to defined | Usually crisp and defined |
| Everyday makeup | Useful for subtle definition | Useful for a clean, precise line |
| Winged eyeliner | Can create a softer wing | Often suitable for a sharp wing |
| Correction | Can be blended or corrected depending on formula | May need careful, targeted correction |
| Best starting technique | Thin line close to the lashes | Short, controlled strokes with a fine tip |
Product performance varies by formula and applicator. If you are new to eyeliner, begin with whichever format feels easier to control and practise before an important event.
10. Eyeliner Safety and Eye-Area Hygiene
The eye area needs gentle handling. Good hygiene matters whenever you use eyeliner or other eye cosmetics.
-
Wash your hands before applying makeup.
-
Do not share eye cosmetics or applicators.
-
Keep product tips and brushes clean according to the manufacturer's instructions.
-
Avoid applying products inside the eye unless they are specifically intended for that area.
-
Do not use eye cosmetics if their texture, smell or condition has changed unexpectedly.
-
Follow expiry and period-after-opening guidance on the packaging.
-
Remove eye makeup gently before sleeping.
-
Stop using a product if it causes irritation.
If you wear contact lenses, follow the hygiene guidance from your eye-care professional and the cosmetic manufacturer.
11. When to Consider Professional Eye Makeup
Practising at home can help you develop confidence with eyeliner. For a wedding, engagement, party, photoshoot or another special occasion, you may prefer a professionally planned makeup look that complements your outfit, overall style and event.
A makeup professional can help you explore options such as subtle lash-line definition, a classic wing, smoky eyes or a more dramatic finish. The right look depends on your preferences, the occasion and the overall makeup plan.
If you are in Lucknow, you can explore makeup services at KNK Awadh Salon & Academy and discuss your preferred style and appointment requirements with the team.
Explore:
KNK has locations in Mahanagar, Gomti Nagar and Hazratganj, Lucknow. Confirm service availability and appointment details directly before booking.
Frequently Asked Questions About Applying Eyeliner
1. Which eyeliner is easiest for beginners?
Pencil eyeliner is often a good starting option because it allows you to create a line using short strokes and can offer a softer finish. A fine-tip eyeliner pen may also feel comfortable for some beginners. Choose a product you can control easily and practise before trying more complicated styles.
2. How do you apply eyeliner without a steady hand?
Rest your elbow on a stable surface, keep your hand relaxed and draw short strokes instead of one continuous line. Start with a thin line and connect the strokes gradually. Taking your time and working in good lighting can make application easier.
3. How do you apply winged eyeliner step by step?
Draw a short flick from the outer corner of your eye, connect its tip back to the upper lash line, fill the small triangle and refine the edge. Check the result with your eyes open and use the first wing as a guide for the second.
4. How do you apply eyeliner on hooded eyes?
Begin with a thin line close to the upper lashes and check the shape while looking straight ahead. Adjust the wing to suit your visible eyelid space, and add thickness gradually. A fine-tip applicator can help with controlled placement.
5. How can you stop eyeliner from smudging?
Start with clean, dry eyelids, use a suitable formula, apply thin layers and allow the eyeliner to set according to the product instructions. Avoid rubbing your eyes and remove makeup gently. Smudge resistance varies by formula, skin and environmental conditions.
6. Should you apply eyeliner before or after eyeshadow?
For a crisp line or wing, many people prefer to apply eyeliner after blending their eyeshadow. For a soft or smoky look, pencil or gel eyeliner can be applied earlier and blended. Choose the order that works best for the effect you want.
7. How do you make eyeliner look even on both eyes?
Start with a thin line on each eye, compare the shape while looking straight ahead and make small adjustments. For wings, use a similar angle and length on both sides as a guide. Natural differences between the eyes mean exact symmetry is not always possible.
8. Can you apply eyeliner without eyeshadow?
Yes. Eyeliner can be worn on its own for a simple everyday look. Apply a thin line close to the upper lashes and add mascara if desired. You do not need eyeshadow to create a defined eye makeup look.
9. How do you remove eyeliner safely?
Use a makeup remover designed for the eye area and follow its instructions. Gently dissolve the product rather than rubbing or pulling the eyelid. Keep the remover out of your eyes, and stop if you experience irritation.
10. Where can I explore professional makeup services in Lucknow?
You can visit the KNK Awadh Salon & Academy website to explore makeup services and contact the team about your preferred look and appointment requirements. KNK has locations in Mahanagar, Gomti Nagar and Hazratganj, Lucknow.
Final Thoughts
Learning how to apply eyeliner is easier when you start with a simple technique and build your skills gradually. Choose an eyeliner you can control, work with short strokes, check your eye shape with your eyes open and practise a small wing before attempting more dramatic styles.
Whether you prefer a natural everyday line or a defined wing for a special occasion, the most useful technique is the one that feels comfortable and complements your personal style.
For professional makeup inspiration and service enquiries in Lucknow, explore KNK Awadh Salon & Academy.
Explore makeup services: https://www.knksalon.in/makeup
Contact KNK: https://www.knksalon.in/contact-us
Ready for your personalized transformation?
Book a bespoke styling, skin glow, or bridal look with the creators behind this story.